Monday, 12 November 2007

I can do that!


Make these 8 (4 each of 2 designs) beautifully simple cards using only 4 x A4 pieces of coloured Stampin' Up! Cardstock (2 x Chocolate Chip and 2 x Pretty in Pink) and 1 1/2 A4 sheets of Stampin' Up! Whisper White Cardstock.

Simply stamp all over the Whisper White Cardstock, using the Big Pieces and Little Pieces Sets; in So Saffron, Pretty in Pink and Chocolate Chip. Cut the full sheet of A4 into 4 equal rectangles 148 x 105mm. Cut the half sheet into 4 equal 50 x 148mm strips.

Cut 2 A4 sheets of Chocolate Chip Cardstock in half to create 4 cards. Fold each card to form the card and then tear the front two thirds of the card away, making sure not to discard it.

Secure White Organdy Ribbon around the upper section of the card as pictured and then adhere the stamped rectangle under the flap, thereby hiding the ends of the ribbon.

Complete the look by stamping 'thankyou' from Wonderful Words Stamp Set in the bottom right hand corner of the card in Chocolate Chip Ink.

To complete the matching set of cards, simply cut 2 Pretty in Pink A4 sheets in half to create 4 cards. Adhere the leftover Chocolate Chip 'ripped' section across the card as pictured. Complete the look by adhering the stamped strips across the brown cardstock and stamp 'thankyou' with the same set. Additional extras may be added, such as the clear button, simply adhered with a mini glue dot over one of the flowers to create texture and interest.

Images © Stampin' Up! 1990 - 2007


Simple alterations to the 'process' of this card will result in a completely different look. Instead of 'stamping out' the entire sheet of A4 Whisper White, try cutting it into 4 first. Then you can compose your design elements, so that they do not appear randomly.

Monday, 20 August 2007

Mini Album Continues


'Because I am 4, who needs a reason to dress up'

By now you will have realised that there is another theme throughout this album and that is the journalling. Journalling can be a real stumbling block and when you are making an entire album in a few days, steamlining your journalling can help. Each of my pages starts with the statement 'Because I am 4' and this statement is finished with the featured photos in mind.

Images © Stampin' Up! 1990 - 2007


'Because I am 4, I like to experiment tasting lemons'

Lucky I caught this shot on camera, because I don't think Ben will be doing this anytime soon! I remember going to Primary School with a boy who regularly sucked lemons and he was a bit weird! So glad Ben decided the taste did not live up to his expectations! Notice in this double page that I have used the spiral punch in the top left and bottom right edges to draw your eyes diagonally accross the page.

Images © Stampin' Up! 1990 - 2007

'Because I am 4, I am super cute'

'Because I am 4, I pick up every stick I find'

So, not every page must be a double page. Colourwise, I thought these 2 pages compatible so have paired them up. Note to self - next album, I think I will use black ink for the alphabet stramps in the little grey boxes cut with the Fiskars mini square punch. You can actually see them in real life with grey on grey - something to think about.

Images © Stampin' Up! 1990 - 2007

Thursday, 16 August 2007

More Mini Album Pages


'Because I am 4, there are many advantages, like standing very close in quoits'
Stampin' Write Markers are very useful when you only wish to ink a portion of a stamp. The word 'because' was taken from the 'Just Because' stamp from the Simple Sayings 11 Stamp Set.
Images © Stampin' Up! 1990-2007

'Because I am 4, I want to do everything just like my dad'

Decorating a tag is an excellent way to vary design features and accents in your pages. Tags are a fun way to experiment with different ideas and techniques.

Images © Stampin' Up! 1990-2007


'Because I am 4, Life is a Beach'

Try cutting out letters with the convex square punch. This is a really easy way to put your letters where you want them. Adhering these letters with Stampin' Dimensions adds depth and texture to your page.

Images © Stampin' Up! 1990-2007

Wednesday, 15 August 2007

The Mini Album Tour Begins


'Because I am 4,
I am happy having more candles than my age'
This is the first double page of my mini album. Expect to see alphabet stamps used throughout the album. Alphabet Stamps are an excellent way to add titles and journalling because you never run out of popular letters and you can colour coordinate the letters.
Images © Stampin' Up! 1990-2007

'Because I am 4, I am big and tough and small and gentle'

This mini album is 8 x 8 inches in size and you will be beginning to see a formula emerge. Having a structure or formula for your mini album will not only tie the project together, but will also make it easier to complete. My basic furmula for the layout was to start with a 'basic black' mat of 8 x 8 inches and also 2 central mats cut from 'Confetti White' ans 'Going Gray'. I then added one colour that complimented the photograph, between the black and the two central mats.

Images © Stampin' Up! 1990-2007


'Because I am 4,
I'm not old enough to know how lucky I am to be Australian'

Stamps are also a great way to add elements, such as the stars, that tie in with the photograph. You will also be noticing another theme running through the album, which is the use of the new Spiral Punch from the Spring Mini Catalogue. It is wonderful and so easy to use, creating an interesting visual border.
Images © Stampin' Up! 1990-2007

Tuesday, 7 August 2007

'Mini Themed Scrapbooking Album' Series


Well I am back after being struck down with the dreaded flu. However, I have not been totally inactive whilst recovering, keeping busy working on a special album for my son Benjamin, who recently had his 5th birthday. I love scrapbooking, however, I often hear how people are dismayed that it is a never ending task that they never seem to get finished and it is just something else they stress about because they are falling behind. The answer to this problem is to make mini albums by concentrating on chunks of time, events or themes. This way you have the satisfaction of completing a defined project. Making a 'mini themed album' also encourages you to use only the most relevant photographs - there is after all, no need to scrapbook every photograph that you take! Over the next 2 weeks I will take you on a tour of this album, sharing tips and techniques about how you can make your own album.

Monday, 9 July 2007

Christmas in July Stampin' Up! Tags


This is one of my favourite tags from the Christmas in July Class that was run at Botanix on Saturday. Everyone made 10 Christmas tags (2 each of 5 designs) as well as decorating 2 tins to put them in. This particular tag features the snowflake Stampin' Around Wheel with Whisper White Craft Ink, Heat and Stick Powder, and Dazzling Diamonds Glitter. Gold Cardstock from the Metallics pack made the perfect foundation for this mini masterpiece. The glitter brads were created by adhering a mini glue dot to the top of a silver brad and then dipping into glitter. Paper Angels are in the process of mapping out our Christmas Workshop, which will be held on the 6th of October at the Carina Leagues Club. We have some great projects planned and it is going to be a great day. Invitations for this event will be mailed out within the next fortnight.


Images © 1990 - 2007 Stampin' Up!

Friday, 6 July 2007

Same Design | Different Stampin' Up! Colours


Once you have created or copied a design that you like, I suggest recreating it in different colour schemes. Inspiration for changing the colour scheme may come from the photographs, the fabulous Stampin' Up! colour wheel or even magazine layouts are a great source of beautiful colour combinations. On the above examples, I used Elegant Eggplant, Real Red and More than Mustard; using the same stamps and design from the previous posting.

Images © 1990 - 2007 Stampin' Up!

Wednesday, 4 July 2007

Matching Cranberry Card and Page


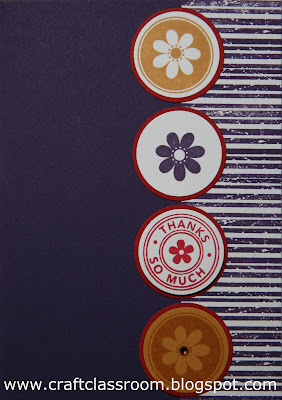
Simple striking colour combinations such as Cranberry Crisp, Cool Caribbean and Marigold Morning are worth repeating, and so I have created a matching card and page. Both of these projects feature Stampin' Up's Hostess Set - Riveting as well as the stamp set Shelly so kindly gave Stampin' Up Consultants at Christmas - Seeing Spots. These projects are made ever so faster using the companion circle punches. The striped section on the card was created using the Background Sampler Set - expect to see heaps more of that stamp set!
Images © 1990 - 2007 Stampin' Up!

Saturday, 2 June 2007

Using Paper Scraps


Sometimes the best way to incorporate patterned paper into scrapbooking layouts is to use small amounts. This has the added benefit of using up all those scraps that might otherwise hit the bin. Hodgepodge Hardware and Designer Ribbon work to tie the design together.
Grand plans were in place to add several pages this weekend. However, my trestle tables have been borrowed for a party, so my supplies are currently sitting in piles all over my workroom floor - so not very functional at all!
Materials
Natural Vanilla and Cranberry Crisp Cardstock; Recollections Scrapbooking Paper; Chocolate Chip Classic Ink; Wonderful Words 11 Stamp Set;Antique Brass Hodgepodge Hardware and Prep School Ribbon Originals.

Friday, 25 May 2007

Making a Difference

Recently I was lucky enough to be involved in a project by a local group of women to make small Mother's Day gifts for the residents of a Bayside Nursing Home. Some of the ladies organised a collection of lavender and teal coloured soaps, whilst others gave their time wrapping the bundles up into gifts. As my resources lie in papercraft, it was logical that it was my job to make the tags. Having mentioned the project to one of my lovely Stampin' Up Hostesses, she kindly offered to help me make the tags (thankyou Jennifer). This made the task really enjoyable as we had the chance to get to know each other a bit better as well as achieving a basket full of tags. Needless to say the residents of the Nursing Home loved their little gifts and we are now thinking about what we will do for Father's Day!
Materials
Looks like Spring Stamp and All-Year Cheer 11 Sets; Confetti White card stock; Lavender Lace and Taken with Teal Classic Ink Pads; Aqua Painter; Not Quite Navy Stampin' Write Marker and Spring Bouquet Flower Punch.
Images © 1990 - 2007 Stampin' Up!

Thursday, 24 May 2007

More Marigold Morning and Going Gray

When you are on a good thing, stick to it! I often find myself going through phases in my scrapbooking, where I repeat a technique or colour scheme that I like, such as the page posted on 22nd of May. Some might think this boring, but I find it literally liberating as I can get more pages done and just get on with the process of enjoying my paper crafting. This colour combination seems to be working really well for me at the moment, as I seem to have lots of photos of my children with garish brighly coloured play equiment - Somehow 'Marigold Morning' seems to coordinate, yet tone it down! The corner rounding and positioning of the page elements has been designed to draw the eyes from top left to bottom right.

Materials

Be Happy, Warm Words and Rough Texture Wheel stamps; Marigold Morning, Going Gray, Whisper White and Basic Black card stock; Marigold Morning, Going Gray Classic Stampin Ink; Black Staz On Ink; Black Ginham Ribbon and Silver Brads.
Images © 1990 - 2007 Stampin' Up!


Wednesday, 23 May 2007

Capture Everyday Moments

Don't you just love digital cameras! Simply keep snapping until you get that perfect shot. My son Benjamin has been blessed with the most amazing brown eyes and long eyelashes, that he uses to full advantage - very hard to get cross when those eyes are staring back at you!

The most meaningful photos are often those that capture everyday moments and I was thrilled to capture a moment when Benjamin was resting on his sister's shoulder, still keeping watch with one of those beautiful eyes. I like to keep the photo the star of the page and, as such, simple clean layouts are often the best. This is very good news for those of us that are time poor (who isn't nowdays!), yet wish to have a creative outlet and celebrate our special photos. This 8 x 8 layout was created using a 6 x 8 landscape photograph, which has the special design feature of completely filling the upper section of an 8 x 8 page. If you wish to create this effect in a 12 x 12 design, it is worth knowing that photos are easily enlarged to 8 x 12. In fact 8 x 10 photos, simply have 2 inches cropped off!

Materials

Classic Alphabet, Canvas Background, Expressive Flexible Phrases and Genuine Articles sets; Ruby Red card stock; Ruby Red and Not Quite Navy Classic Stampin' Pads; Treehouse Designer Paper; Simply Scrappin' At Home photo corner; Kraft Tag Sheets; On Board Simon Lower Case Chipboard and Prep School Ribbon Originals.

Images © 1990-2007 Stampin' Up!


Marigold Morning & Going Gray


Stampin' Up! have a new In Color ™ palette of six new colours, including the very beautiful 'Marigold Morning', which I have teamed with 3 neutrals (Going Gray, Whisper White & Basic Black) to achieve this striking effect. Inspired by a sample at Convention 2007, I used a stamp from the 'Be Happy' Set to create a border of Marigold Morning and Going Gray. The 'Warm Words' Set is sized perfectly to fit over these colour blocks and stamps up well using Black Staz On. The look is completed with Pewter Hardware and Black Grosgrain Ribbon.