Wednesday, 16 January 2008

Display your Creativity


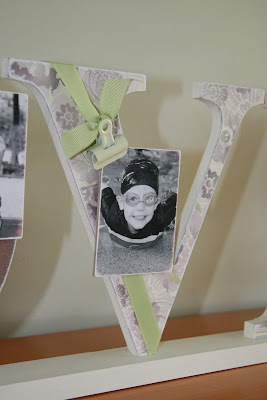
Smaller wooden letters are the perfect palette to display your favourite photos. Why tuck all your work away in albums, when you can coordinate a few simple products; such as Stampin' Up's 'Loves Me' Designer Series Double Sided Paper, 'Be Happy' Stamp Set and 'Flirty' Ribbon Originals. As per my previous entry, I mounted the wooden letters onto a strip of wood, so that they could then be displayed easily on a shelf. Finishing touches include a touch of bling, mini clips, snowball trim and white paint to mask the edges of the letters and base. My daughter, Dana, is now enjoying her new photo decor in her room!

Images © Stampin' Up! 1990 - 2007

Wednesday, 9 January 2008

Enchanté Love Letters


Having packed away our family's Nativity Figurines, I decided it was time to make something new for the front entrance sideboard. I already had the wooden letters, which I had previously covered in papers I was not particularly fond of during a class in Sydney. Rather than start a new project, I thought I would simply renovate and finish a half finished project - good idea I think for the new year! So, I went about covering the wooden letters in Stampin' Up's beautiful Enchantré Designer Series Double Sided Paper and embellishing with various chipboard elements, ribbons, stamped images and photographs. Next came ther tricky bit! As we are unable to mount items on the wall, I had to find a way to make the letters freestanding. I achieved this by purchasing a strip of timber from Bunnings and using a combination of woodworking glue and nails to secure the letters. I then painted the base strip and edges of the letters in Jo Sonja's 'Soft White' Acrylic Paint, which looks just fabulous with the Enchantré Colour Range. I am thrilled with my 'Love Letters' and can feel a bit of a 'craze' coming on, so don't be surprised if you see some more decorated letters up on the blog soon. Naturally, not everything goes smoothly! Gremlins seem to have prevented the 'O' letter phtograph from being featured below - 'shhh', don't tell my daughter Nicole, who I am sure would be miffed, if she realised it was her letter missing. I will endeavour to photograph again tomorrow, so if you would like this missing photograph, please email me on liz@nb.com.au and I will send it through to you.
Images © Stampin' Up! 1990 - 2007


Saturday, 5 January 2008

Fabulous Folds


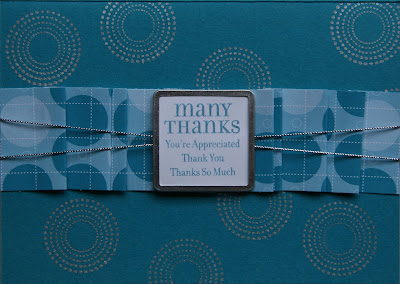
Stampin' Up's 'Loves Me' Designer Series Double Sided Paper, provides an easy starting point to create beautiful cards with ease. Teamed with the beautiful 'Flirty' Ribbon Originals and the 'Lots of Thoughts' Sale-A-Bration Stamp Set, I was able to create 5 card designs that showcase basic folding techniques to add dimension to your cards, such as pleating and fold backs.


I am looking forward to sharing these samples at workshops during January and February and would be happy to share the instructions with you if you would like to make them at home. Alternately, I will be starting 2008 classes soon, so keep posted for the class schedule.


Friday, 4 January 2008

The Imaginative Mind


On Christmas Eve, our family took Grandma Beth out for breakfast at Sirromet. Although it was the day before Christmas Day, we had Christmas Crakers, made of course with Stampin' Up's beautiful Designer Series Paper. Including the crackers I made for Christmas Day, I made 21 of these Mini Masterpieces and although they were a lot of work, they were well worth the effort. Filling each persons crackers with personally chosen items really was wonderful, and were in fact a present in themselves. Making so many means that I have the formula 'down pat' for next year, although, I may not wait that long! A good friend of mine has pointed out that crackers are great at any time of year and why not make birthday crackers.
.

Anyway, as you can see from the photograph, the artistic merit of the cracker was not on my 5 year old son's mind. Benjamin quickly turned his emptied cracker into a telescope! How imaginative and wonderful.